Controlling a UR3 robot with gestures over a network

Hello everyone!

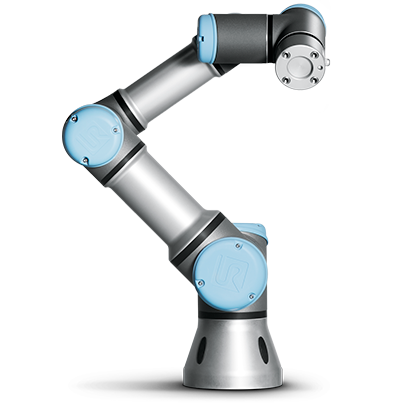
Thankfully, it didn’t take me a year to write a 2nd post! This time it’s about a part of a project I worked on the last 2-3 months (in parallel to my PhD studies of course :P). The topic is again teleoperation, this time only using hardware (last post was about using a virtual environment) such as the UR3 robotic arm below (looks great doesn’t it?).

UR3

The project I contributed to was demonstrated in Mobile World Congress 2017 in Barcelona at one of the booths of Ericsson. Why Ericsson? Because King’s College London (where I study) and Ericsson collaborate on standardizing 5G. I must say it was a pleasure working with everyone who participated.

Needless to say it was a really tiring week as the event hit a record of 108,000 visitors, but what an experience it was…just epic! I also had the chance to meet and discuss with many interesting and amazing people. For more information there is a CNET article with a bit of a demonstration as well 🙂

Anyway…with the amount of time I had available to learn how to use ROS etc and make the robot move, I could only create a gesture system that receives position commands from a client. The positions the robot could move were pre-defined. I wish I had more time to make a direct control application (with speed and range of motion limiters of course).

The juice

You can download the Python script here. So…to make the robot move we used Linux (Ubuntu 14.04 specifically) with ROS. I said “we” because ROS was not used only for making the robot move. Anyhow, to make the app run you need to:

  1. Create a catkin workspace using ROS.
  2. Download the ROS-Industrial universal robot meta-package.
  3. Download ur_modern_driver and put everything inside the workspace’s src folder.
  4. Compile with catkin_make (yes, you will probably need to install many ROS dependencies).
  5. And then open a terminal to launch ROS with:

    $ source path/to/workspace/devel/setup.sh

    $ roslaunch ur_bringup ur3_bringup.launch robot_ip:=xxx.xxx.xxx.xxx (apply the correct robot IP)

  6. Open another terminal to run the application:

    $ source path/to/workspace/devel/setup.sh

    $ rosrun ur_modern_driver network_move.py


Again, as with my previous post…not sure if this is helpful to anyone but it’s good to have it documented somewhere 🙂

DIY Reverb pedal PCB (in Greek)

Λοιπόν guys & girls,

Φτιάχνω ένα κύκλωμα ενός πεταλιού reverb για κιθάρα με ελατήρια [1] Εδώ είναι και το σχηματικό για εκτύπωση [2] Η μέθοδος που χρησιμοποίησα είναι η μέθοδος μεταφοράς του σχηματικού μέσω laser printer!

Η μικρή πλακέτα εκτυπώθηκε στο χαλκό τέλεια!!! Στη μεγάλη μου βγήκε πρόβλημα με το μελάνι (βγήκε ελάχιστο μαζί με το χαρτί αλλά αρκετό ώστε να προκαλέσει αλλοίωση του κυκλώματος)

Τί έκανα (στο 5ο βήμα βγήκε το πρόβλημα της μεθόδου) :

1) Με πράσινο σφουγγάρι κουζίνας (τα πουλάνε και σκέτα όχι μαζί με την κίτρινη πλευρά), έτριψα πολύ καλά τη χάλκινη επιφάνεια της πλακέτας να λάμψει. Καθρέφτιζε λίγο μπορώ να πω.

2) Έπειτα εκτύπωσα (με laser printer) σε γυαλιστερό χαρτί περιοδικού μόδας (όχι το εξώφυλλο, τα μέσα φύλλα και σε λευκή σελίδα που έψαξα και βρήκα) το σχηματικό!

3) Έκοψα την περιοχή που με ενδιέφερε και κόλλησα το χαρτί (με κολλητική ταινία στην ακριανή μεριά της πλακέτας) για να είναι σταθερό και να ακουμπάει όσο γίνεται το χαρτί την πλακέτα χωρίς κενά ενδιάμεσα. Φυσικά η πλευρά του σχεδίου πρέπει να βλέπει το χαλκό.

4) Έβαλα το σίδερο στο φουλ (το προθέρμανα αρχικά) ακούμπησα σε ένα χοντρό κομμάτι ξύλο που έχω την πλακέτα με το χαρτί και πάτησα με το σίδερο (από την πλευρά του χαρτιού) για 45”. Μετά το πρώτο γερό πάτημα τον 45 δευτερολέπτων πίεσα προσεκτικά κάθετα προς την επιφάνεια της πλακέτας με τη μύτη του σίδερου σε αρκετά σημεία της πλακέτας. ΜΗΝ το πάτε πέρα δώθε το μελάνι χυθεί παντού στην πλακέτα.

5) Ξέπλυνα με νερό να φύγει το χαρτί. Έμεινε το μελάνι πάνω στον χαλκό. ΑΛΛΑ!!!!

Μέχρι εδώ το προσπάθησα 3 φορές. Το μελάνι ΔΕΝ έμενε πάντα στις περιοχές που έπρεπε αλλά απλωνόταν και για αυτό αναγκάστηκα να ξύσω προσεκτικά τις περιοχές που δεν ήθελα μελάνι.

Όταν αποκολλήθηκε σε ορισμένα σημεία έφυγε και λίγο μελάνι. Κάτι που είναι σημαντικό διότι καταστρέφει το επιθυμητό κύκλωμα (μετά την αποχάλκωση). Έτσι μια πρόχειρη λύση που βρήκα ήταν να βάψω αυτά τα σημεία με ανεξίτηλο μαρκαδόρο και εν μέρη δούλεψε!

6) Στην αποχάλκωση δεν πείρα έτοιμο αποχαλκωτικό. Έφτιαξα το δικό μου και δούλεψε σούπερ! Το έκανα δυστυχώς περίπου με το μάτι (σύγκρινα παρόμοια δοχεία, τεσπά πατέντα της στιγμής) αλλά σε 4 λεπτά έφυγε ο χαλκός!!!

130 ml HCl υδροχλωρικό οξύ (6-12% περιεκτικότητα, πείρα τηλέφωνο τον Έλλην κατασκευαστή και αυτό μου απάντησαν) και 3 σφυνάκια perhydrol (περιεκτικότητα 50% Η2Ο2, το κοινό οξυζενέ του φαρμακείου μου είχε 3% περιεκτικότιτα).  Περίπου αναλογία  5:1. Πρώτο το HCl μετά λίγο λίγο το perhydrol. Βούτιξα την πλακέτα με προσοχή (φορούσα γάντια, γυαλιά και δεν άφησα εκτεθημένο σημείο του σώματος μου). Το μείγμα αυτό είναι ΚΑΥΣΤΙΚΌ και ΤΟΞΙΚΌ!!! Δεν χρησιμοποιούμε μεταλλικά σκεύη. Μονάχα πλαστικά ή γυάλινα.

Με το που έβαλα την πλακέτα άφρισε, έβγαλε καπνούς (είναι τοξικοί) και έγινε γαλαζοπράσινο. Ο χαλκός έφυγε σε 4 λεπτά.

Είμαι σε αυτό το βήμα αυτή τη στιγμή και το αποτέλεσμα είναι αυτό [3]

Θα δοκιμάσω τώρα να βγάλω το μελάνι με ακετόνη (το ασετόν που είχα και ήταν για νύχια είχε έλαια κτλ δεν έκανε τίποτα σχεδόν όπως θα δείτε). Θα ακολουθήσουν και άλλα posts όπως καταλαβαίνετε!

[1] http://www.solorb.com/elect/musiccirc/reverb2/index.html

[2] http://gaussmarkov.net/layouts/springrev/project.pdf

[3] https://picasaweb.google.com/lh/photo/E3ti09J6kqIqDvSFrDv5hg?feat=directlink

FossComm 2011 and OpenFest 2011 review

This is my review from 2 events I attended and participated in. I will just report with few words what happened and what I did there. Of course I wasn’t alone. As always Fedora rocked with his presence (I will explain later). But! I didn’t only participate with Fedora. You know, I am basically a hardware guy, I study electronics (currently at my last semester, yeah!)

====OpenFest 2011===

OK! Since OpenFest 2011 was first I will start with this event! It was organized by students of the department of Computer Systems at the TEI of Pireaus. I think the Fedora booth was exemplar and with a lot of people helping! We had one bad comment though…few people really wanted the Fedora cheat cubes again on our booth table. I also believe it’s a very cool swag and it’s just a piece of paper! So, people should just wait for our next event 🙂

At OpenFest I made a presentation on Fedora 15 (mentioning and showing a bit of Gnome 3 magic). Pierros and Nikos did a very cool workshop on how to survive with Gnome 3 too!

I also co-presented a workshop with Pierros and Konstantinos concerning Arduino. While it was introductory, we had to repeat it for 2 times more! The room had about 35 seats I think, but at the first 2 presentations people were even standing outside the windows to watch (not to mention that the door was open and people were trying to listen from outside. The 3rd presentation was made in a bigger room the next day.

Photos (thanks to Thalia and Dimitris):

https://picasaweb.google.com/saliyath/OpenFest2011#

https://picasaweb.google.com/dimitrisglaros/Openfest2011#

===FossComm 2011===

Last but not least, the major open source event in Greece. This time at the Univercity of Patras, organized by the Department of Computer Engineering and Informatics. What I really need to mention is that the schedule of FossComm 2011 tried to cover the needs of everyone and I think it did. We enjoyed a lot of good presentations and workshops!

I need to mention that while the Fedora booth was represented well by all the Ambassadors who came to support, Fedora made the difference in the event’s schedule. We had good and many presentations. Not any community can do that 🙂

Of course the swag was there on both booths (Fedora and Mozilla).  But not always there. Visitors, hosts, everyone took everything 🙂

Together with Pierros Papadeas (also made presentations on Fedora and Mozilla at FossComm 2011 ) we did again, as in OpenFest 2011, an introductory Arduino presentation. If I could only have the time to show more code! People were starving for code! Something that we kind of did at OpenFest 2011 🙂 I wanted to talk to people about how useful a library and how Arduino is part of the “Internet of things” nowadays, showing Pachube and the completely opensource Thingspeak.

Presentations I attended:

  • Melissi project by Giorgos Logiotatidis (If you are looking for cloud/python stuff please please check it out and ask)
  • Building a platform-agnostic wireless network of interconnected smart objects using open source tools
    by Anastasia Protopapa and Basilios Georgitzikis (who I thank for his hospitality!). Interconnecting different Zigbee nodes? Sounds like the future to me!
  • hackerspace.gr – hackerspace αλα ελληνικά (I will post more details when hackerspace.gr will be completely ready, but you can follow us on the wiki, the mailing list, identi.ca , twitter or even facebook. We want to share the news everywhere.)

I think I didn’t fully attend something else, but I watch the work of many of the people that presented and I am fully aware of what they do and still wish the best for them. One example is the work of the foss.ntua team Consuela a very handy arduino project for controlling lights with a simple web client setup.

Photos (thanks to Thalia, and Dimitris) :

https://picasaweb.google.com/saliyath/Fosscomm2011Patras02#

https://picasaweb.google.com/dimitrisglaros/Fosscomm2011#

Once again, a big thank you to the hosts and organizers of the events. Another thank you to those who helped!

Microwave circuit design/sim programs on Fedora

Hello once more,

Recently I made a presentation at the TEI of Pireaus on Arduino and Fedora Electronic Lab. Hopefully, I will repeat it to give the chance to more people to come.

I intend to make some simple tutorials (we’ll see how complex they’ll get on the way actually) on using programs that assist or create designs and simulations of microwave circuits and set-ups. In this post, I will just post a simple guide to install some programs that deal with the design and simulation of microwave circuits and components. What I am trying to do is at least reach the 3D FDTD simulation using free and open source software. Currently I have found Qucs, Transcalc, emGine and MIT’s Meep that will help us reach this goal. I am trying to install Elmer-FEM (which looks extremely cool and a lot easier than Meep) but unfortunately, I couldn’t install it due to problems with a certain dependency (ftgl-devel is installed but not found 😦  see here).

You can easily install Qucs with : $ su -c “yum install qucs” (it’s also inside Fedora Electronic Lab together with other valuable packages). It’s a circuit simulation program (not only for microwave circuits) that has various microwave components to use.

Transcalc is ” an analysis and synthesis tool for calculating the electrical and physical properties of different kinds of RF and microwave transmission lines”. The idea behind this is to get the dimensions of real components and then use the results (the parameters we need) in our simulation programs!

To install Transcalc you will need to install the GTK2.0 development files (gtk2-devel on fedora). After you download the package and place it in a folder of your choice (I have a “programs” folder and place every to-be-installed program there) you can go to the terminal and write :

$ cd ./your_path_to_transcalc_folder/

$ ./configure (if something is missing search in yum or “Add/Remove applications”)

$ make

$ su -c “make install” ….and to run the program just type : $ transcalc

A few words for emGine! It’s a full-wave 3D electromagnetic field simulation environment solving Maxwell’s equations in time-domain. You create 3D models of your components, put the parameters and then simulate and get your graphs and results. Not 3D FDTD.

Let’s install it then! You are going to need to find and install (if not already installed): tkinter , python, vtk , vtk-devel, wxWidgets (I got wxBase, wxGTK, wxGTK-gl, wxGTK-media installed) , wxPython, numpy and python-matplotlib. Now go to the download page and get the package (emGine GUI platform independent of course) .

As you understand we are going to compile using python. So, go to the emGine folder (like we did in transcalc) and just type in your terminal:

$ python emGine.py

It might take a bit to run, but if nothing is missing the program shoud start. And that’s for the emGine environment.

Now, to the more serious staff. Meep is an FDTD program to model electromagnetic systems! One of my next posts will be an example running a 3D (I hope) simulation (if not a 3D then a 2D). I will try to get the dimensions of a real waveguide, get the parameters from Transcalc, use them on Meep to visualize a cool simulation and maybe see what we can do on a circuit with Qucs.

What did I need to install Meep on Fedora 14?

libctl (new version on the link, or install libctl and libctl-devel version 3.0.2 from yum etc.), hdf5 and hdf5-devel. I think that was all I needed.

Then let’s go to the terminal one last time:

$ export LDFLAGS=”$LDFLAGS -lm”    (this line is needed to avoid the DSO Linking error with libm.so)
$ make
$ make install

Now if you type: $ meep …you should get:  meep>    I tried to make a 2D example to simulate a waveguide. Not the fastest thing I have done in my life 😛

The reference is here. Start the calculations and wait for my 2nd post. (Also, just found it, check this out, there are tools like the japanese ADVENTURE and its modules)

%d bloggers like this: